| This article is a stub. You can help Bless Online Wiki by expanding it. |
This page will serve as a basic How to play guide for Bless Online. While there is very little information available at this time, we urge you to check back often, as new information is being added all the time! Feel free to edit this guide with any tips, tricks, and suggestions.
Basic gameplay[ | ]
Battle System[ | ]
You can battle NPCs and players from a different faction.
The color of an NPC’s name shows that NPC’s characteristics:
- NPCs whose names are displayed in green are friendly NPCs that the player cannot battle with.
- NPCs whose names are displayed in yellow are neutral and will fight back if attacked.
- NPCs whose names are displayed in red are hostile and will attack even if the player doesn’t attack first.
- NPCs whose names are displayed in grey are NPCs that are already in battle with another character.
The name of a character from the same faction will be displayed in white, while the name of a character from the opposite faction will be displayed in red.
- You may not battle players from the same faction unless there’s a 1:1 or guild war.
- You can battle players from the opposite faction, except in some protected areas .
Leveling Up[ | ]

Your character can level up by obtaining and gathering EXP.
- Your character can obtain EXP when:
- Defeating an enemy (NPC or character)
- Successfully taming a monster
- Successfully Gathering / Mining
- Successfully Crafting an item
- Completing a Quest
- Completing Monster Book
- Completing a Mission
(Obtaining EXP points through the actions listed above is not always guaranteed)
Leveling up increases a character’s basic combat skills.

Basic Controls[ | ]
Basic character movement operation can be achieved through [Q, W, E, S] or [W, A, S, D] keys. For a more indepth view of the key controls pressing the ESC key and then clicking on the Interface button will bring up the Interface Settings where Game Settings and Key Settings can be changed.
Tab-targeting System[ | ]
The Control Mode is different depending on the class of the character you select.
- If you choose a Guardian, Ranger, Mage, Paladin or Assassin class character, your character will have a targeting control system.

The targeting system has the following characteristics:
a. The mouse cursor will not affect your character’s movement until it’s clicked.
b. You can change your character’s direction and perspective by holding down the mouse button.
c. You can choose your target by clicking on it directly.
d. Each time you press the Tab key, a different enemy is selected starting from the nearest one.
| Visualisation | Operation | Function |
|---|---|---|
| Hold left click and drag mouse | Camera Rotation | |
| Hold right click and drag mouse | Camera & Character Rotation | |
| Press A Key | Camera & Character Rotation | |
| Press D Key | Camera & Character Rotation | |
| Click Mouse Wheele | Camera direction reversal |
Action-targeting (Non-targeting) System[ | ]
- If you choose a Berserker class character, your character will have a non-targeting control system.

The non-targeting system has the following characteristics:
a. Your character’s movements and perspective will change just by moving the mouse cursor, regardless of clicking or not.
b. The mouse cursor is usually hidden until the Alt key is pressed.
c. Through the non-targeting system, damage is dealt to the closest enemy without target them separately.
d. However, lock-on can be activated by pressing the Tab key to observe a specific target.
| Visualisation | Operation | Function |
|---|---|---|
| Drag mouse | Camera Rotation | |
| While moving drag mouse | Camera & Character Rotation |
Tips and tricks[ | ]
Inventory/Items[ | ]
The inventory can be accessed by pressing the [I] key. The number of new items added to your inventory is displayed on the relevant inventory tab as a notification (which disappears when you hover over the object). The new items would also blink in your inventory.
1. Inventory[ | ]
1. Number of Slots
Tells you how many slots are occupied and how many you have in total.
2. Item Tabs
You items are divided into [Regular] and [Costume].
3. Each character is given 48 regular slots and 2 Free expansion of 8 as the character progresses (64 total), with the option to expand your inventory size using Lumena. There is a max of 160 regular slots.
1.1 Features
Players can automatically sort their items by pressing the [Sort] button.
Players can also split up bundled items into the desired amount by clicking the [Split Items] button. Holding [Ctrl] while left clicking on the target item will also allow you to split up your items. The split feature is only available for stacked items.
1.2 Personal Storage[ | ]
Items can be saved and stored in the storehouses found in specific towns.
Storehouse[ | ]
This is a place where you can store your inventory items. Each character has their own personal storage with up to 48 slots, and items of all types, bound or unbound can be stored.
![]() Look for this icon on your map to find your storehouse.
Look for this icon on your map to find your storehouse.
Accessing Your Storehouse[ | ]
You can access your personal storage by talking to the Storehouse Keeper NPC.
Once the storage window is open, you can either drag the item from your inventory to the storage window, or right click on the item to move it. The same is for moving your items back to your inventory.
You can permanently delete items from your storage by dragging them outside of the storage window. Items which have an expiry date will automatically be removed when expired.
2. Items[ | ]
2.1 Rarity and Type[ | ]
An item’s rarity in Bless Online is indicated by their border color, and are classified into the following categories

| Common | Magical | Rare | Heroic | Legendary |
There are 6 different item to types:
| Type | Items |
| Weapon | Dagger, Axe, Shield, Bow, Staff, Mace, Wand,Sword |
| Armor | Helmet, Breastplate, Belt, Gloves, Pauldron (shoulder armor), Pants, Shoes |
| Accessories | Necklace, Ring , Link ,Braclet |
| Consumables | Health potions, Energy potions, Gathering tools, Taming items , Combat items |
| Quest Items | Quest start items, usable, collectables |
| Miscellaneous (Junk) | Dropped items etc. |
2.2 Item Sets[ | ]
Depending on how many items of a certain set you have equipped, the effects may vary. Hovering over the item will give you information on what items are a part of the set and which ones are equipped.
2.3 Usage[ | ]
1. Information about an item appears when you hover your mouse over the item. In the case of combat equipment (weapon, armor etc.), stats for what is currently equipped will also appear for comparison. 2. Consumable items are used and combat items equipped by left-clicking on the item.
2.3.1 Using Potions[ | ]
Using potions during battle allow you to recover health and energy. Depending on their type they can be graded as minor, lesser, normal, greater, or superior. Potions can be bought from the general store, or you can craft them yourself.
3. Currencies and Activity Points[ | ]
3.1 Activity Points[ | ]
Activity Points are points rewarded through in-game activities such as hunting, war, or exploring dungeons.
| Type | Example of Activities |
| Exploring dungeons, hunting quests | |
| PVP, contributions in battle |
3.2 Currencies and Lumena[ | ]
Currency consists of gold, silver, and copper coins.
100 copper = 1 silver, 100 silver = 1 gold
Lumena, can be used in many places in the game.
4. Selling Your Items[ | ]
You can sell your items to any NPC shop owner by right clicking on the item or dragging and dropping it onto the store’s window. You can also sell all your miscellaneous (junk) at the same time by pressing [Sell All Junk Items] at the bottom of your page.
4.1 Auction House[ | ]
The auction house allows you to sell items to other players or buy items from them. You are allowed to put up a max of 15 items at the same time with a 15% tax (10% with premium).
Bidding is also an option on some items.The bidding system functions by allowing players to pay the fixed price by the seller in order to enter a lottery system in which a maximum number of bidders can enter.
5. Discarding your Items[ | ]
Unwanted items can be discarded by dragging it outside of the inventory window, where a pop up window will ask you to confirm your decision.
Travel[ | ]
“Travel” refers to modes of long-distance transportation that takes the player from one base to another. Players must pay a fixed amount to the Travel NPC when accessing transportation services.

1. How to Travel[ | ]
- Talk to the Travel NPC, marked as
 on the map, to access transportation service.
 - Select your destination on the map. The route and fee will be shown.
Note: Places that a player has yet to visit will not be shown on the map, and are therefore inaccessible by travel.
| Current Location | |
| Possible Destinations | |
| Invalid Destination – Inactive Base: You are currently unable to travel to this base |
Once “Depart” is selected, the travel fee will automatically be paid and your character will begin traveling according to the displayed path.
Note: Players are unable to control their character or perform certain actions during travel.
1.2 Travel Fee[ | ]
Fees are calculated based on distance and the number of bases that you pass by. If you pass by multiple bases, the total fee is the sum of each individual fee required for traveling to each base separately.
Note: if you are using the premium PURPLE service, then all travel fees are discounted.
Marking Bases and Teleportation[ | ]
You can mark your location as a base by using the [Talisman of Memory] brought from the Lumena Shop. To teleport to your base, you must use the [Teleportation Talisman].
Note: The [Talisman of Memory] and [Teleportation Talisman] are both consumable items, and will be consumed every time you mark your location or teleport.
Talisman of Memory - Allows you to mark your current location as a base
Teleportation Talisman – Teleports the player to the selected base
Talisman of Memory[ | ]
You can mark your current location as a base by right-clicking on the [Talisman of Memory]![]()
Teleportation Talisman[ | ]
Right-clicking on the [Teleportation Talisman] will bring up the map. All travel-able bases as well as personal bases are shown.![]()
| Bases available for teleportation |
Once you click on the base you wish to travel to, the [Teleportation Talisman] will automatically be consumed and your character will teleport.
2.3 Delete Base[ | ]
After right-clicking on the personalized base icon in the world map, select [Delete Base].
Check point[ | ]

You can designate a frequently visited location as your checkpoint. You can teleport to your checkpoint by using the [Stone of Recall].
| Cooldown Time | 30 Minutes |
| How to Change Checkpoints | Talk to NPC |
| Number of Checkpoints | 1 |
Setting a Checkpoint[ | ]
After verifying the location of the checkpoint on the map, you can set the checkpoint by talking to the desired location’s Recall NPC.
Returning to Checkpoint[ | ]
You can assign the [Return Stone] to the action bar for quick access.
Recall has a channeling time of 6 seconds. However, if you are attacked or if you press the [ESC] key before you return, it will be canceled.
Why was I unable to return to my Checkpoint?[ | ]
Reasons and situations for why you may not be able to return to your checkpoint is listed below.

| Unable to initiate return | Return process was canceled |
|---|---|
| Your character is currently dead | Pressing the [ESC] key |
| Your character is currently a spirit | When attempting to return, you were rendered unable to return (refer to “Unable to initiate return”) |
| Your character is currently moving/in travel | HP was reduced during return process |
| Character is currently in the midst of using another skill | |
| The skill is still cooling down |
Resetting the Return Stone’s Cooldown time[ | ]
The cooldown time could be reset by using Lumena but the price changes depending on how much cooldown time is left. Once the cooldown time is reset using Lumena, your character will automatically attempt the return process.
Quests[ | ]
Completing Quests:Quests
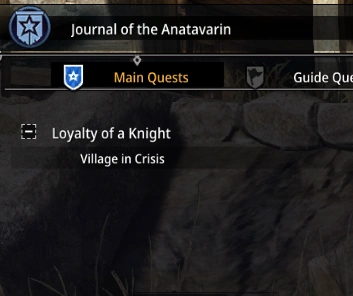
Anatavarin’s Journal refers to the quests of Bless Online. It can be accessed by pressing the [J] key, and it is literally a journal in which information (details and rewards etc.) about your quests, in-progress or completed, are recorded. Aside from the main quests, quests can also be obtained from NPCs and items.
Footprints of Destiny[ | ]
Footprints of Destiny is a series of quests that follow the main storyline. These quests are mandatory as they help the character grow and the story progress. The story behind each quest can be found under the Footprints of Destiny tab in Anatavarin’s Journal [J].
Starting Footprints of Destiny[ | ]
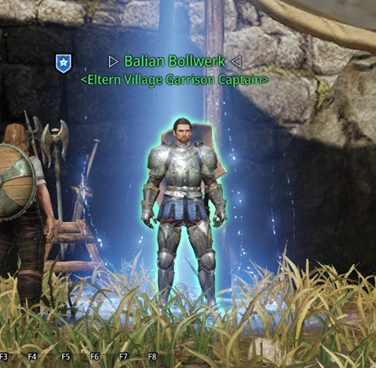
The Footprints of Destiny is automatically unlocked once the character reaches the required level. The quest officially begins once you speak to the NPC illuminated by a blue light.
Objectives and Description[ | ]
The Footprints of Destiny is made up of several stories. For each story there are quests with interrelated and progressing objectives. A story ends once all the quests of a story is completed. If a player completes all the quests and objectives within a story, they will receive a reward.

Quest Location[ | ]
Clicking on the [View Location] button at the bottom of the quest info page (when the button is available) will allow you to see where the quest is located on the map.
Note: If a quest is in progress it will display the quest area, but if it was already completed, it will display the location of the NPC that you need to talk to for the reward.
| Location of NPC | |
| Quest Area | |
| Destination |
Restart a Quest[ | ]
If you fail to complete a quest, pressing the [Restart] button will reset it.
Completing a Quest[ | ]
Once the tasks for a quest are finished, talking to an NPC will complete the quest and allow you to obtain rewards. You will automatically move on to the next story once all quests of the current storyline are complete.
Memories of a Journey[ | ]
Memories of a Journey is a series of episodic quests that vary by region. These quests can be seen as an extension of Bless’ main story, and through them a player can experience the everyday happenings or special events of the Bless world. The story and objectives of each quest can be found in Anatavarin’s Journal under the Memories of a Journey tab.
Starting Memories of a Journey[ | ]
New quests can be obtained from NPCs with![]() . NPCs with quests are also marked on the map.
. NPCs with quests are also marked on the map.
Objectives and Descriptions[ | ]
A player can have no more than 30 active Memories of a Journey quests at a time. The information of in-progress or completed quests can be found under the Memories of a Journey tab. Players can choose to have quests in progress displayed on the Quest Progress View.
Quest Levels[ | ]
Memories of a Journey quests are divided into 5 levels. The quests are color coded into red, orange, yellow, green, and grey, with red being the hardest. The difficulty levels are relative to a player’s current level, therefore what is red for a lower level player maybe green to a higher level player.
Other Quest Types[ | ]
- Quest Item: quests that can only be begun by obtaining, using or interacting with a specific item.
- Time Specific Quests: quests that can only be carried out during the day/night
- Timed Quests: quests that must be completed within the time limit. If a player fails to do so they can try again after selecting [Give Up].
Quest Location[ | ]
Clicking on the [View Location] button at the bottom of the quest info page (when the button is available) will allow you to see where the quest is located on the map.
Note: If a quest is in progress it will display the quest area, but if it was already completed, it will display the location of the NPC that you need to talk to for the reward.
Quest Progress Indicators[ | ]
| New Quest | |
| In-progress | |
| Completed | |
| Failed | |
| Quest Area | |
| Destination |
Giving Up[ | ]
If you would like to give up on or restart a quest, press the [Give Up] button at the bottom of the quest info page and obtain the quest again from the ![]() NPC.
NPC.
Completing a Quest[ | ]
When a quest is complete talk to the NPC with ![]() and obtain your reward and experience points.
and obtain your reward and experience points.
Note: some quests automatically disappear from your Quest Progress View after completion even if you do not talk to an NPC.
Enemies and Monsters[ | ]
Enemies and Monsters consists of hunting quests that rewards players with Discovery Points when completed. Players can find information about the different monsters in each area under the Enemies and Monsters tab in Anatavarin’s Journal.
Starting Enemies and Monsters[ | ]
Upon the completion of certain Footprints of Destiny quests, new areas are added to the Enemies and Monsters tab. Also, hunting a new type of monster will generate a new monster information page. These pages provide players with details and taming information on the monsters by area.
Quest Location[ | ]
Clicking on the [View Location] button at the bottom of the quest info page (when the button is available) will allow you to see where the quest is located on the map.
![]()
Any in-progress quests will also be displayed on the Quest Progress View.
Redo[ | ]
The [Redo] button is only available after a player has completed all the stages of a quest, and is located on the top right of the page. The [Redo] button allows players to restart the quest from the very beginning. However, players may need to perform additional activities in order to access certain quests.
Professional Skills[ | ]
There are 2 types of professional skills.

1. Characters can have a main professional skill, and a secondary-professional skill.
2. Professional skills can create skill relevant items and increase EXP.
When crafting items, the relevant professional skill’s EXP increases.
Your skill level will increase If you obtain the required amount of EXP. Depending on the level of our professional skill, you may acquire various status effects.
You may choose one of the three following main crafting skills.
- Armorsmithing
- Enchanting
- Handiwork
You may choose one of the following two sub-crafting skills:
- Cooking
- Alchemy
Main Crafting EXP and Level[ | ]
You can increase your Main and Sub Crafting Skill EXP every time you craft something.
Your level increases once you accumulate the required amount of EXP.
There may be crafting or battle benefits (for some characters) when you level up.
Gathering EXP and Level[ | ]
You can obtain Gathering and Mining EXP each time you Gather and Mine Gathering / Mining level increases when Gathering / Mining EXP is accumulated and reaches a certain amount.
You can get Gathering / Mining related rewards by increasing your character’s Gathering / Mining level.


Taming[ | ]
You can tame monsters with taming scrolls.

Using a Taming Scroll will start the Taming Mini Game.
The rule of the mini game is to press the space bar at the correct time so that the pointer stops in the indicated area.

If you succeed in the taming game, you will receive taming related rewards.
Reward: You can obtain a mount or pet depending on the type of target monster.
You can find your mount or pet in the Companions window.
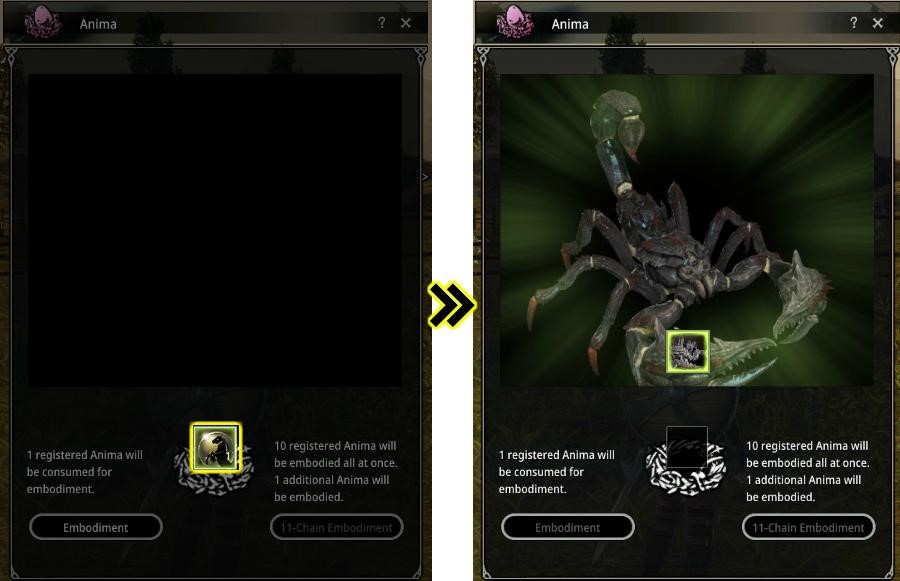
There is even a chance to get Anima items if you succeed in a rare tame.

If you collect a certain amount of Anima items, you can take a chance in obtaining a random companion.
Taming EXP and Level[ | ]

You can obtain Taming EXP every time you tame a monster.
Taming level increases when Taming EXP is accumulated and reaches a certain amount.
You can get travel companion and mount related rewards by increasing your character’s Taming level.